SHOOTING AT NIGHT
Have you ever went out at night to take a few photos and then once you got back home you realized all your images are blurry, grainy or both? If so here are a few tips just for you. Remember this place is where we share our thoughts and experiences in order to gain a deeper understanding in the world of photography. With that being said lets get started

NIGHT GLOW
1. FIND THE LIGHT
Don’t worry this also applies to those who only use their phones. As a photographer weren’t always granted the best lighting scenarios and this is especially true for street photographers who prefer to shoot at night. A good way to deal with this is by seeking out light. It can be street lights, neon signs, or even car lights. Just remember light is the life of photography and your use of it can make and break an image. You can also get creative for example let’s say you don’t have the advantage of a traditional lighting setup like a strobe or continuous LED. There are still many option for portable LED lights that can fit right in your pocket.

MIDNIGHT TRAIN
Here is an example of finding the light in a dark situation. Not only does the light help illuminate our subject but the choice of the lighting scenario allows for great story telling.
2. USE FASTER LENSES
It goes without saying that using faster lenses that allow aperture’s like F1.8 - F1.2 can really be advantages when shooting at night. You typically find these aperture’s in prime lenses which also comes with a bonus because they’re typically small and allow you to move around better with a lite weight lens. These apertures allow for faster shutter speeds and lower ISO’s. This is because they allow more light into your camera and all these things help you eliminate unwanted results in your images.
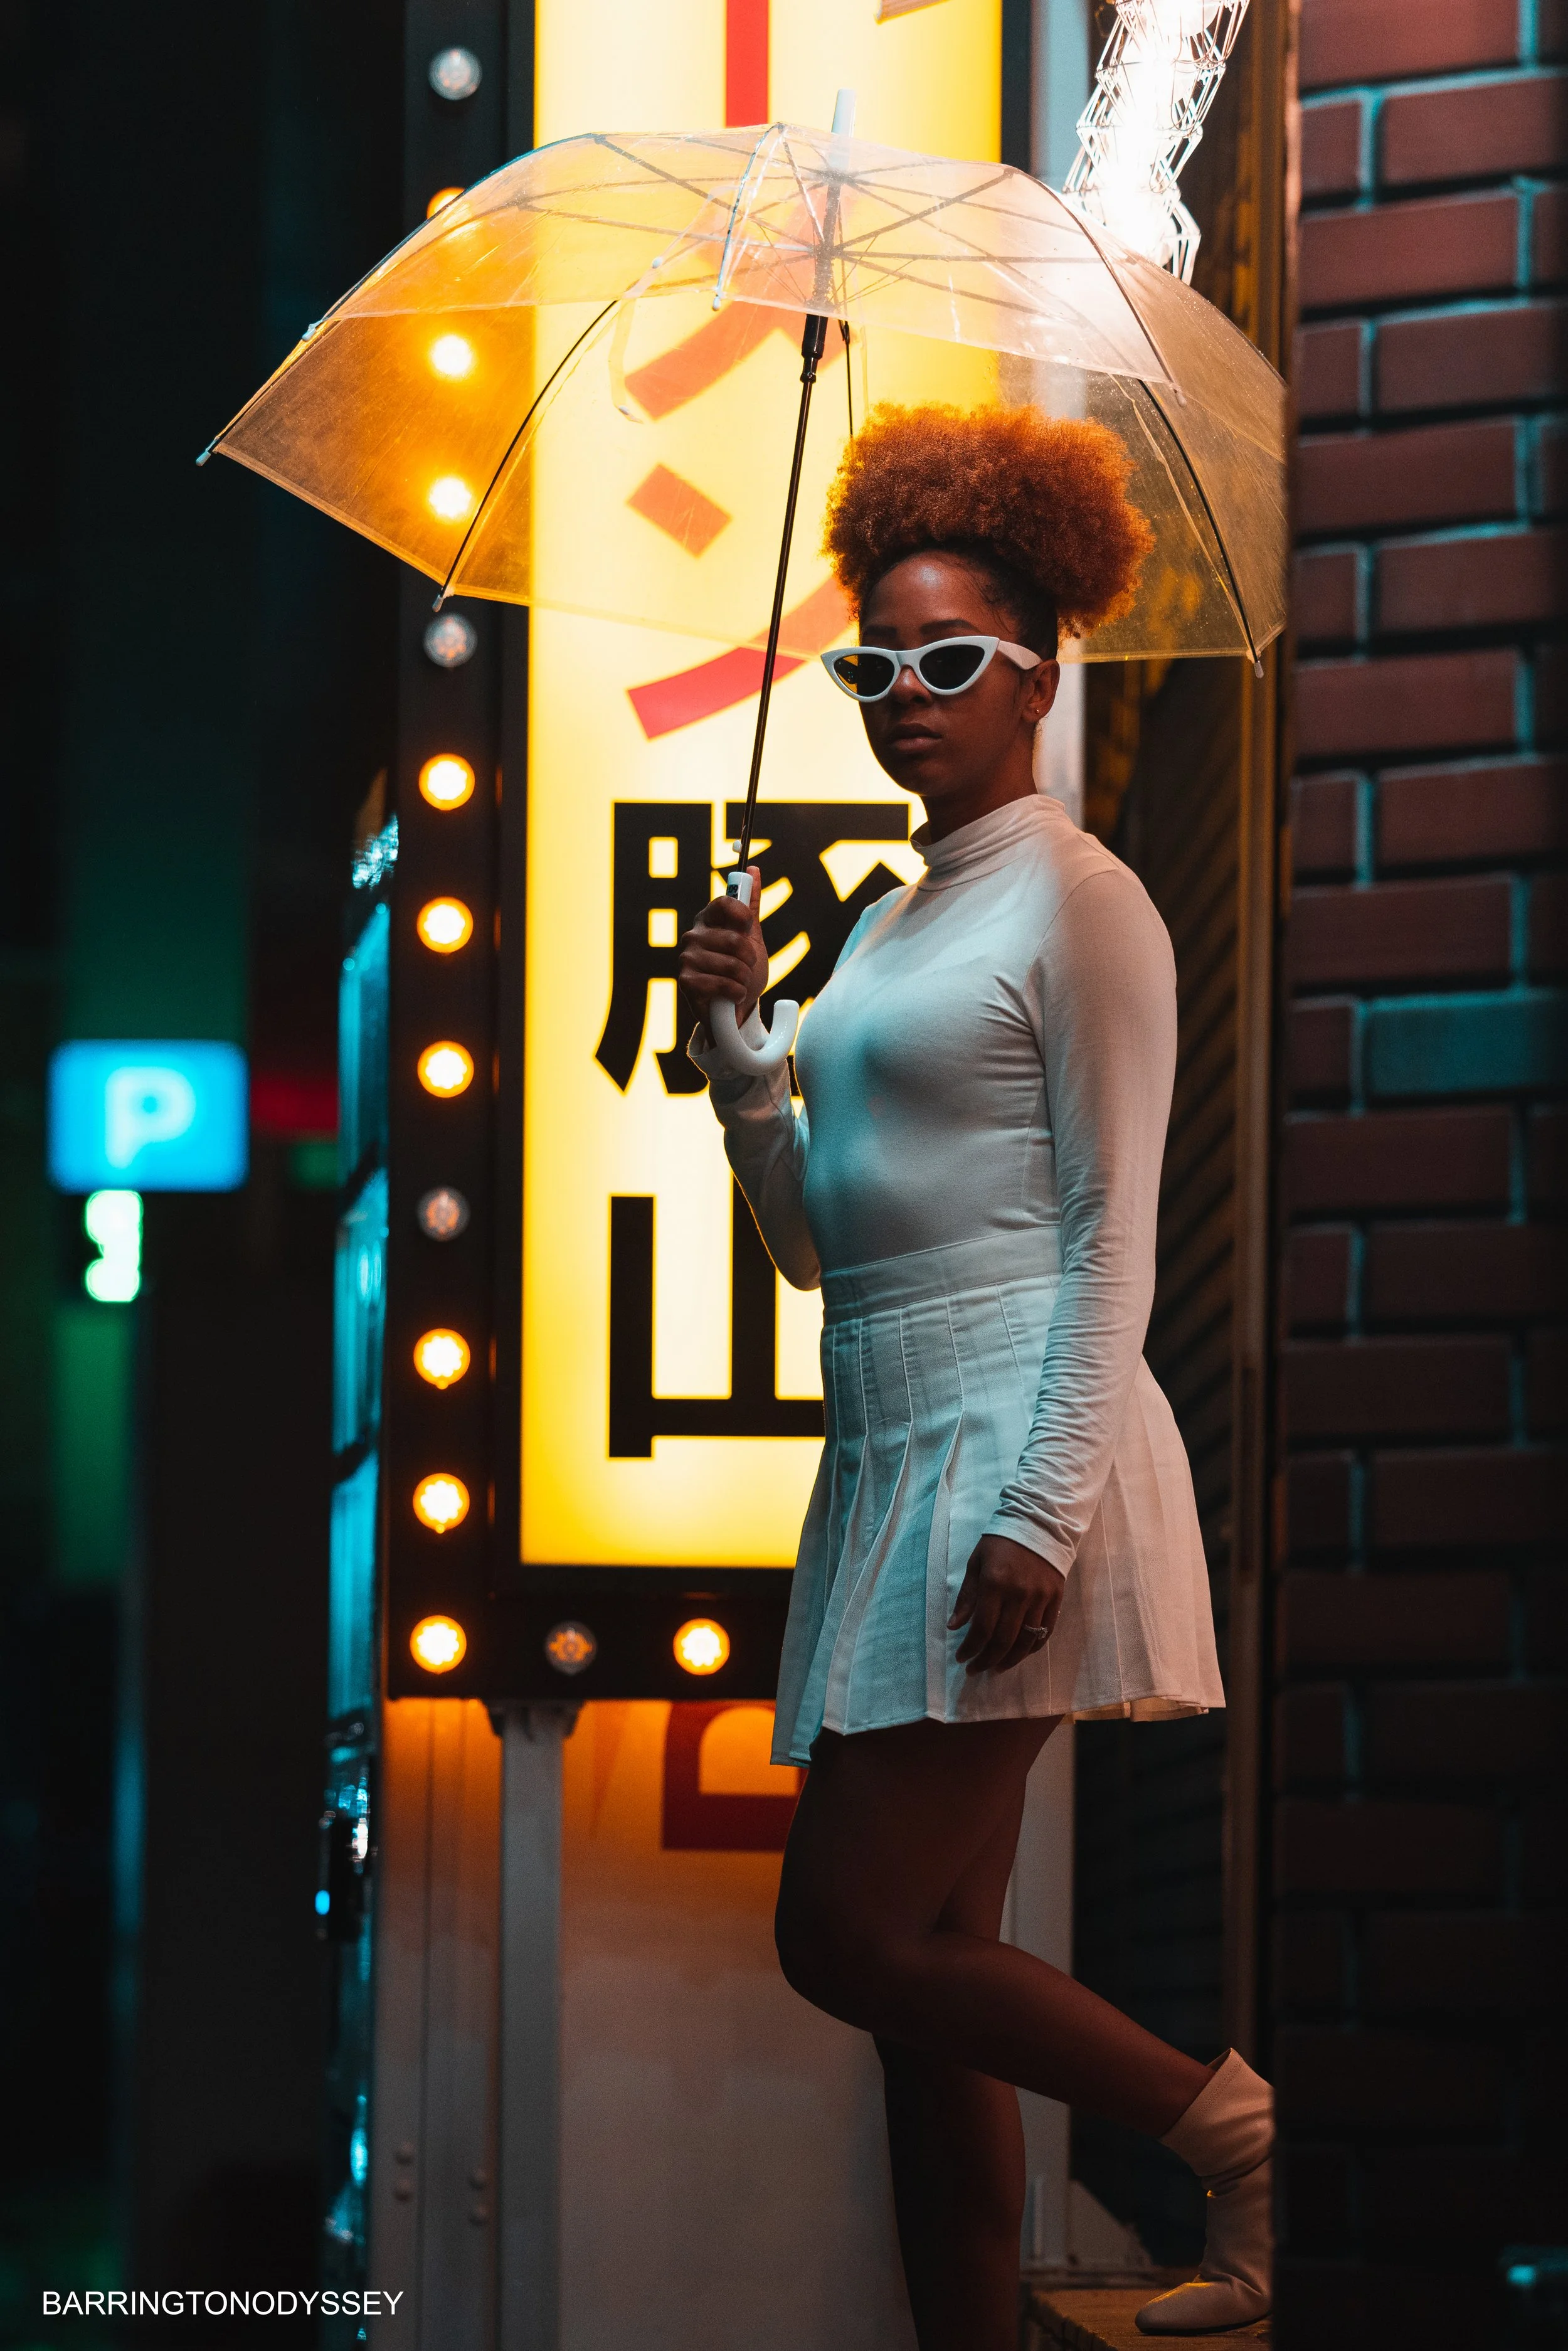
RAMEN DATE NIGHTS
This image is an example of the benefits of using faster lenses. Allowing us to capture our subject in motion. You probably can’t believe that she is moving.
3. TRIPOD & REMOTE
Now obviously everyone isn’t walking the city with a tripod let alone a camera remote but perhaps you should. Without even mentioning the creative possibilities you have using this combination let me just mention the obvious advantage and that is stability. You see when you take photos at night or even just low light you are typically going to be using slower shutter speeds. This means that you are more likely to get blurry images or simply put images that aren’t as sharp because humans have a tendency to move even when you think you’re standing perfectly still. This is especially the case when trying to capture light paintings and light trails from traffic for example.
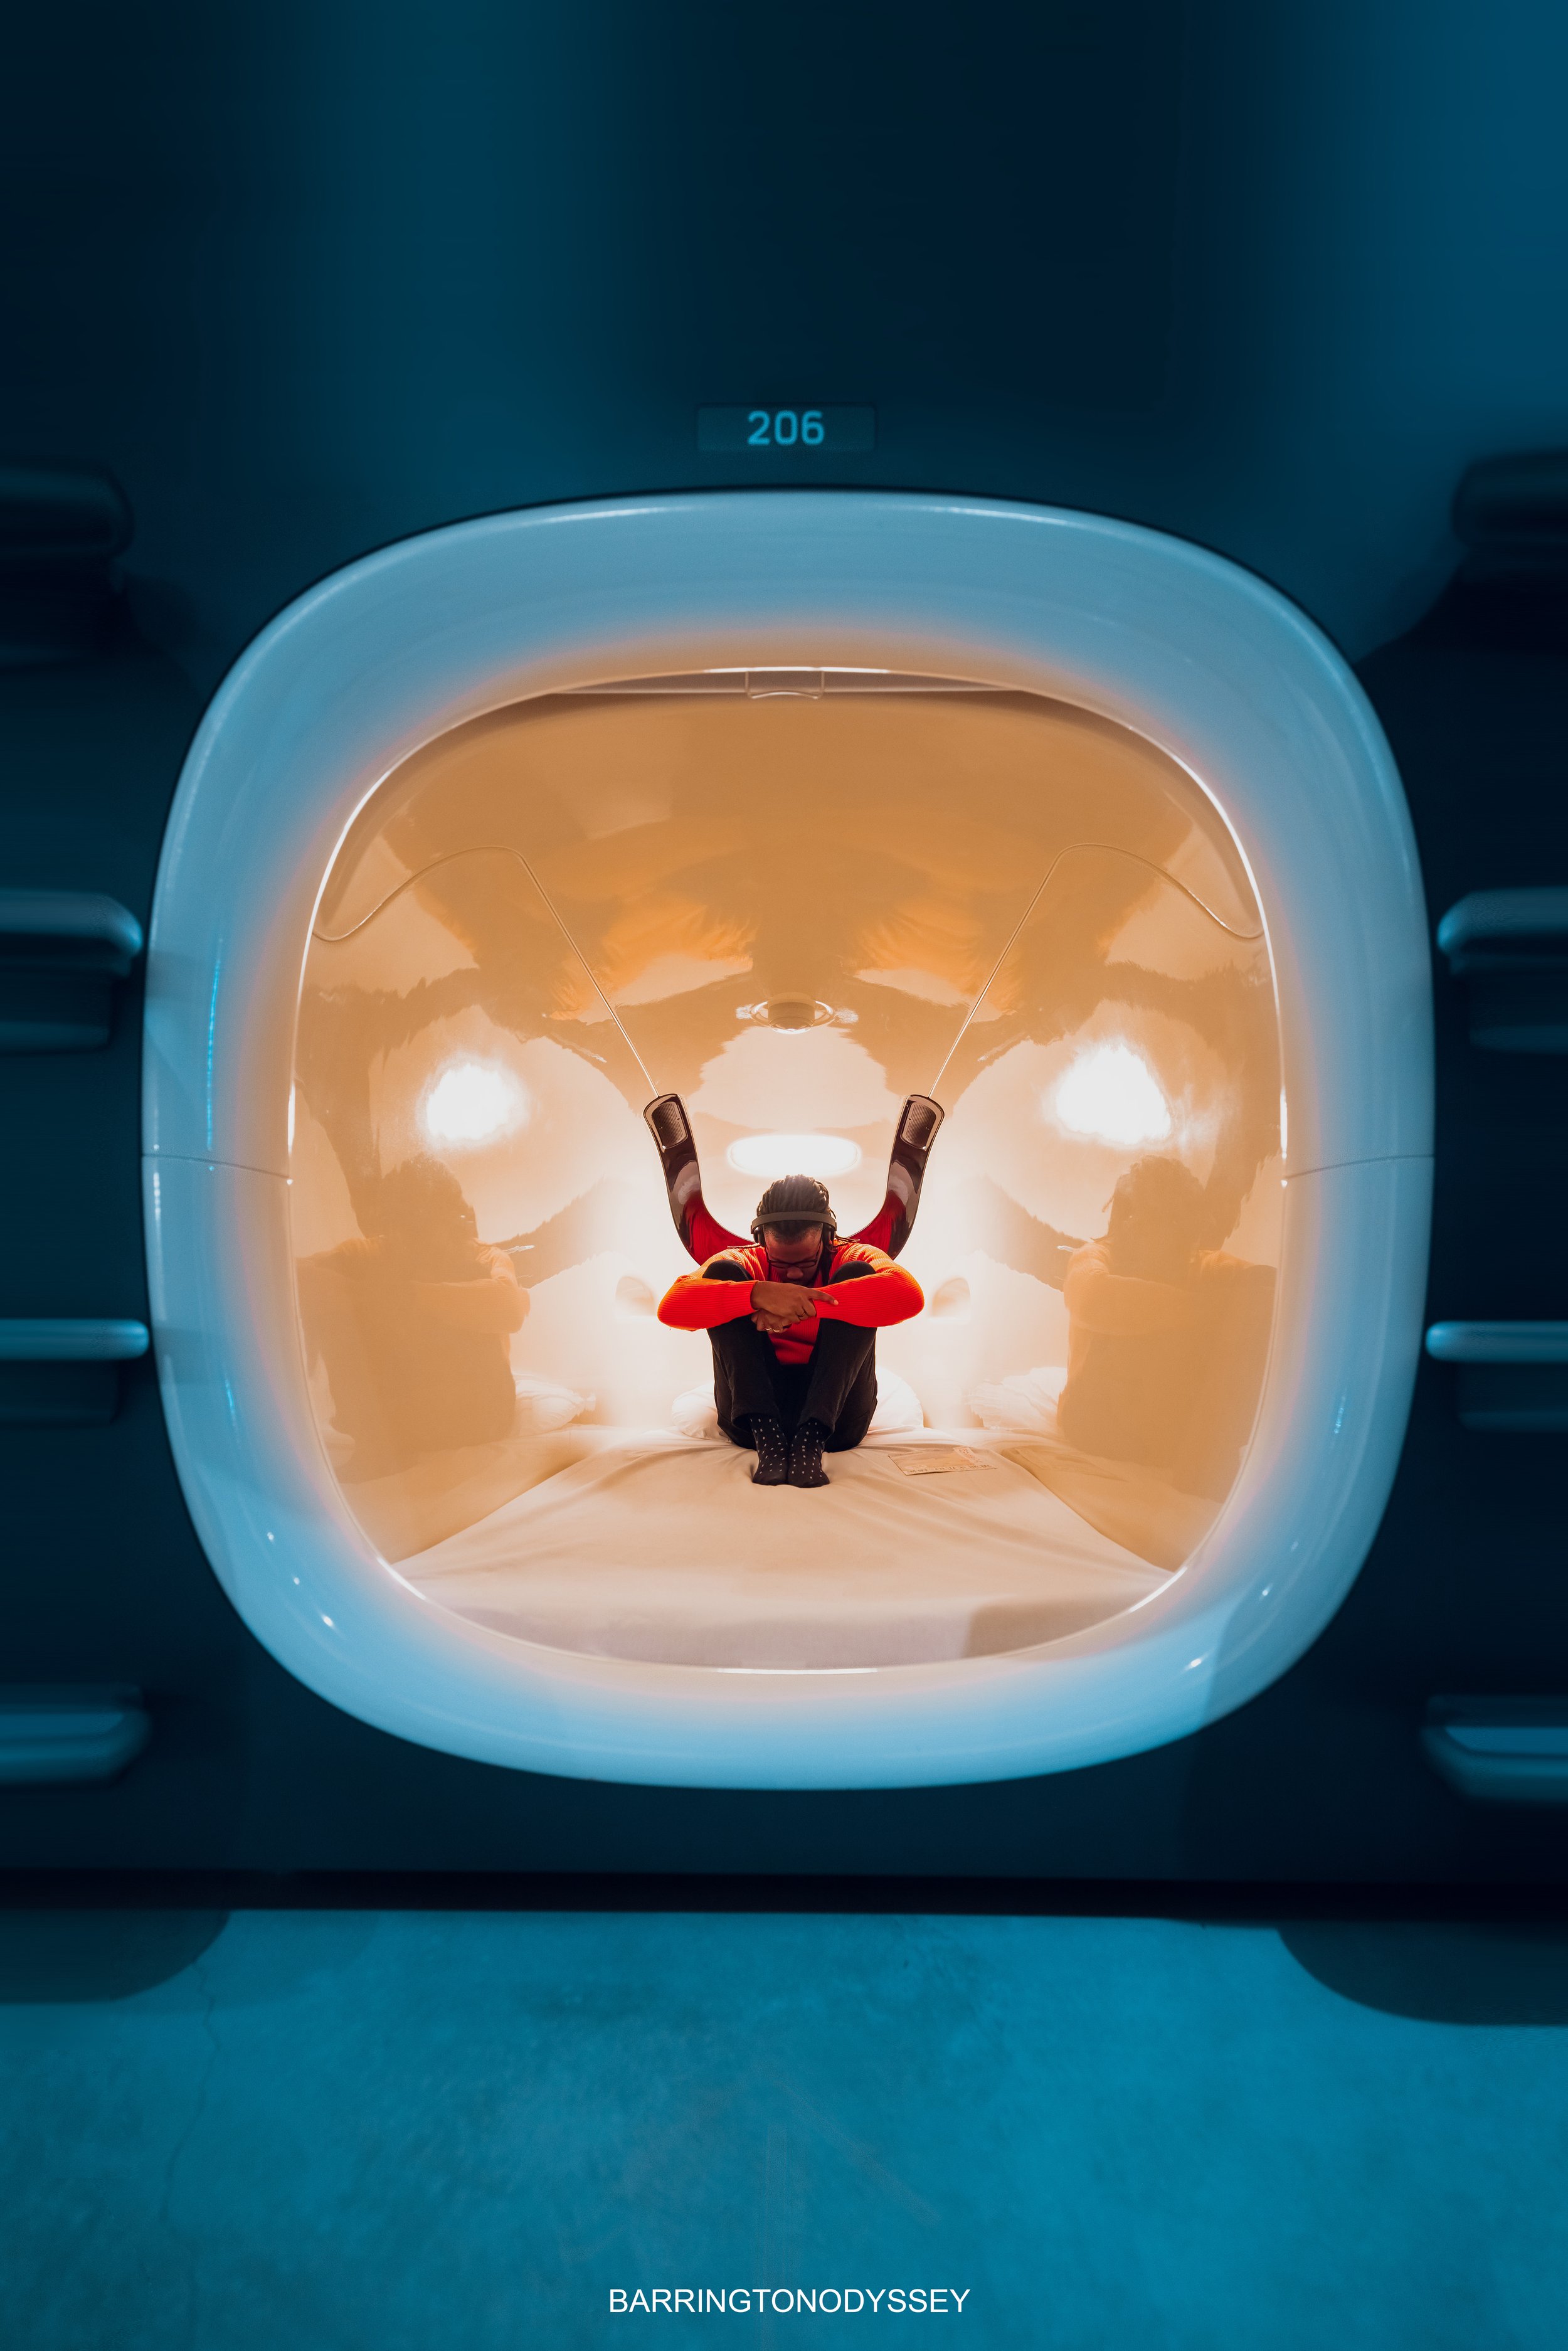
OUT OF TOUCH
This image is perfect example of why tripods are important. This is a relatively dark room. Through the use slow shutter speeds I was able to lower my ISO’s and raise my aperture to achieve great results. This was only possible because of my use of a tripod and a camera remote.

RAINBOW CORNER
Here is another example of using a tripod to your advantage to achieve achieve sharp images at night. Here I was able to raise my aperture decrease my shutter speed and lower my ISO substantially.
That wraps things up for my “SHOOTING AT NIGHT” for creatives. If this was helpful please let me know in the comment section and of course if you have any questions or suggestions feel free to share them below. Thanks for reading and I’ll see you next time on The FO&O.